When You Need This
Stratos runs on the same PC as your simulator by default — no setup required. You only need this guide if your sim and Stratos are on different machines on the same home network, for example:- A dedicated simulator PC with Stratos on a laptop or streaming box
- A cockpit rig where only the visuals run on the sim PC
- Running Stratos on a Mac while the sim runs on Windows
Step 1 — Find the Sim PC’s IP Address
On the PC running the simulator, open Command Prompt and run:192.168.1.5. Write it down.
Step 2 — Let Stratos In
MSFS 2020, MSFS 2024, P3D, FSX
These sims read a small settings file calledSimConnect.xml when they start up. On most installs the file already exists — you just need to change one line in it. Open the file at the path below for your sim:
- MSFS 2024 (Microsoft Store / Xbox)
- MSFS 2024 (Steam)
- MSFS 2020 (Microsoft Store / Xbox)
- MSFS 2020 (Steam)
- Prepar3D v4 / v5
- FSX
<SimConnect.Comm> blocks — one for each connection type. The only one you need to touch is the first one, labelled Static IP4 port. It’ll look roughly like this:
<Address>, usually sitting at the bottom of the block:
- If it says
<Address>127.0.0.1</Address>→ change it to<Address>0.0.0.0</Address> - If the
<Address>line is missing entirely → add<Address>0.0.0.0</Address>just before the closing</SimConnect.Comm>tag
0.0.0.0 lets the sim accept connections from other machines on your network. 127.0.0.1 means “same PC only”. While you’re there, note the <Port> value (usually 500) — you’ll need it in the next step. Leave every other block in the file alone.
Save the file, then restart the simulator. That’s it on this side.
What if the file doesn't exist, or is empty?
What if the file doesn't exist, or is empty?
Some installs don’t ship a Save, then restart the sim.
SimConnect.xml. If that’s you, create a new file at the path above and paste in this minimal template:X-Plane 11 / 12
Nothing to change. X-Plane already accepts remote connections out of the box on port49000.
Step 3 — Point Stratos at the Sim PC
On the machine running Stratos, open Settings (gear icon in the sidebar) and scroll to Tracking Provider. The control offers three modes — Automatic, SimConnect, and X-Plane:- Automatic (the default) probes both SimConnect and X-Plane at their configured addresses and connects to whichever simulator is running, re-detecting between flights if you switch sims. It works with a remote sim too — the per-simulator IP/port you set below still apply.
- SimConnect / X-Plane force a single provider. Pick the one that matches your sim if you want to pin it (for example, a remote rig you don’t want auto-switched away from).
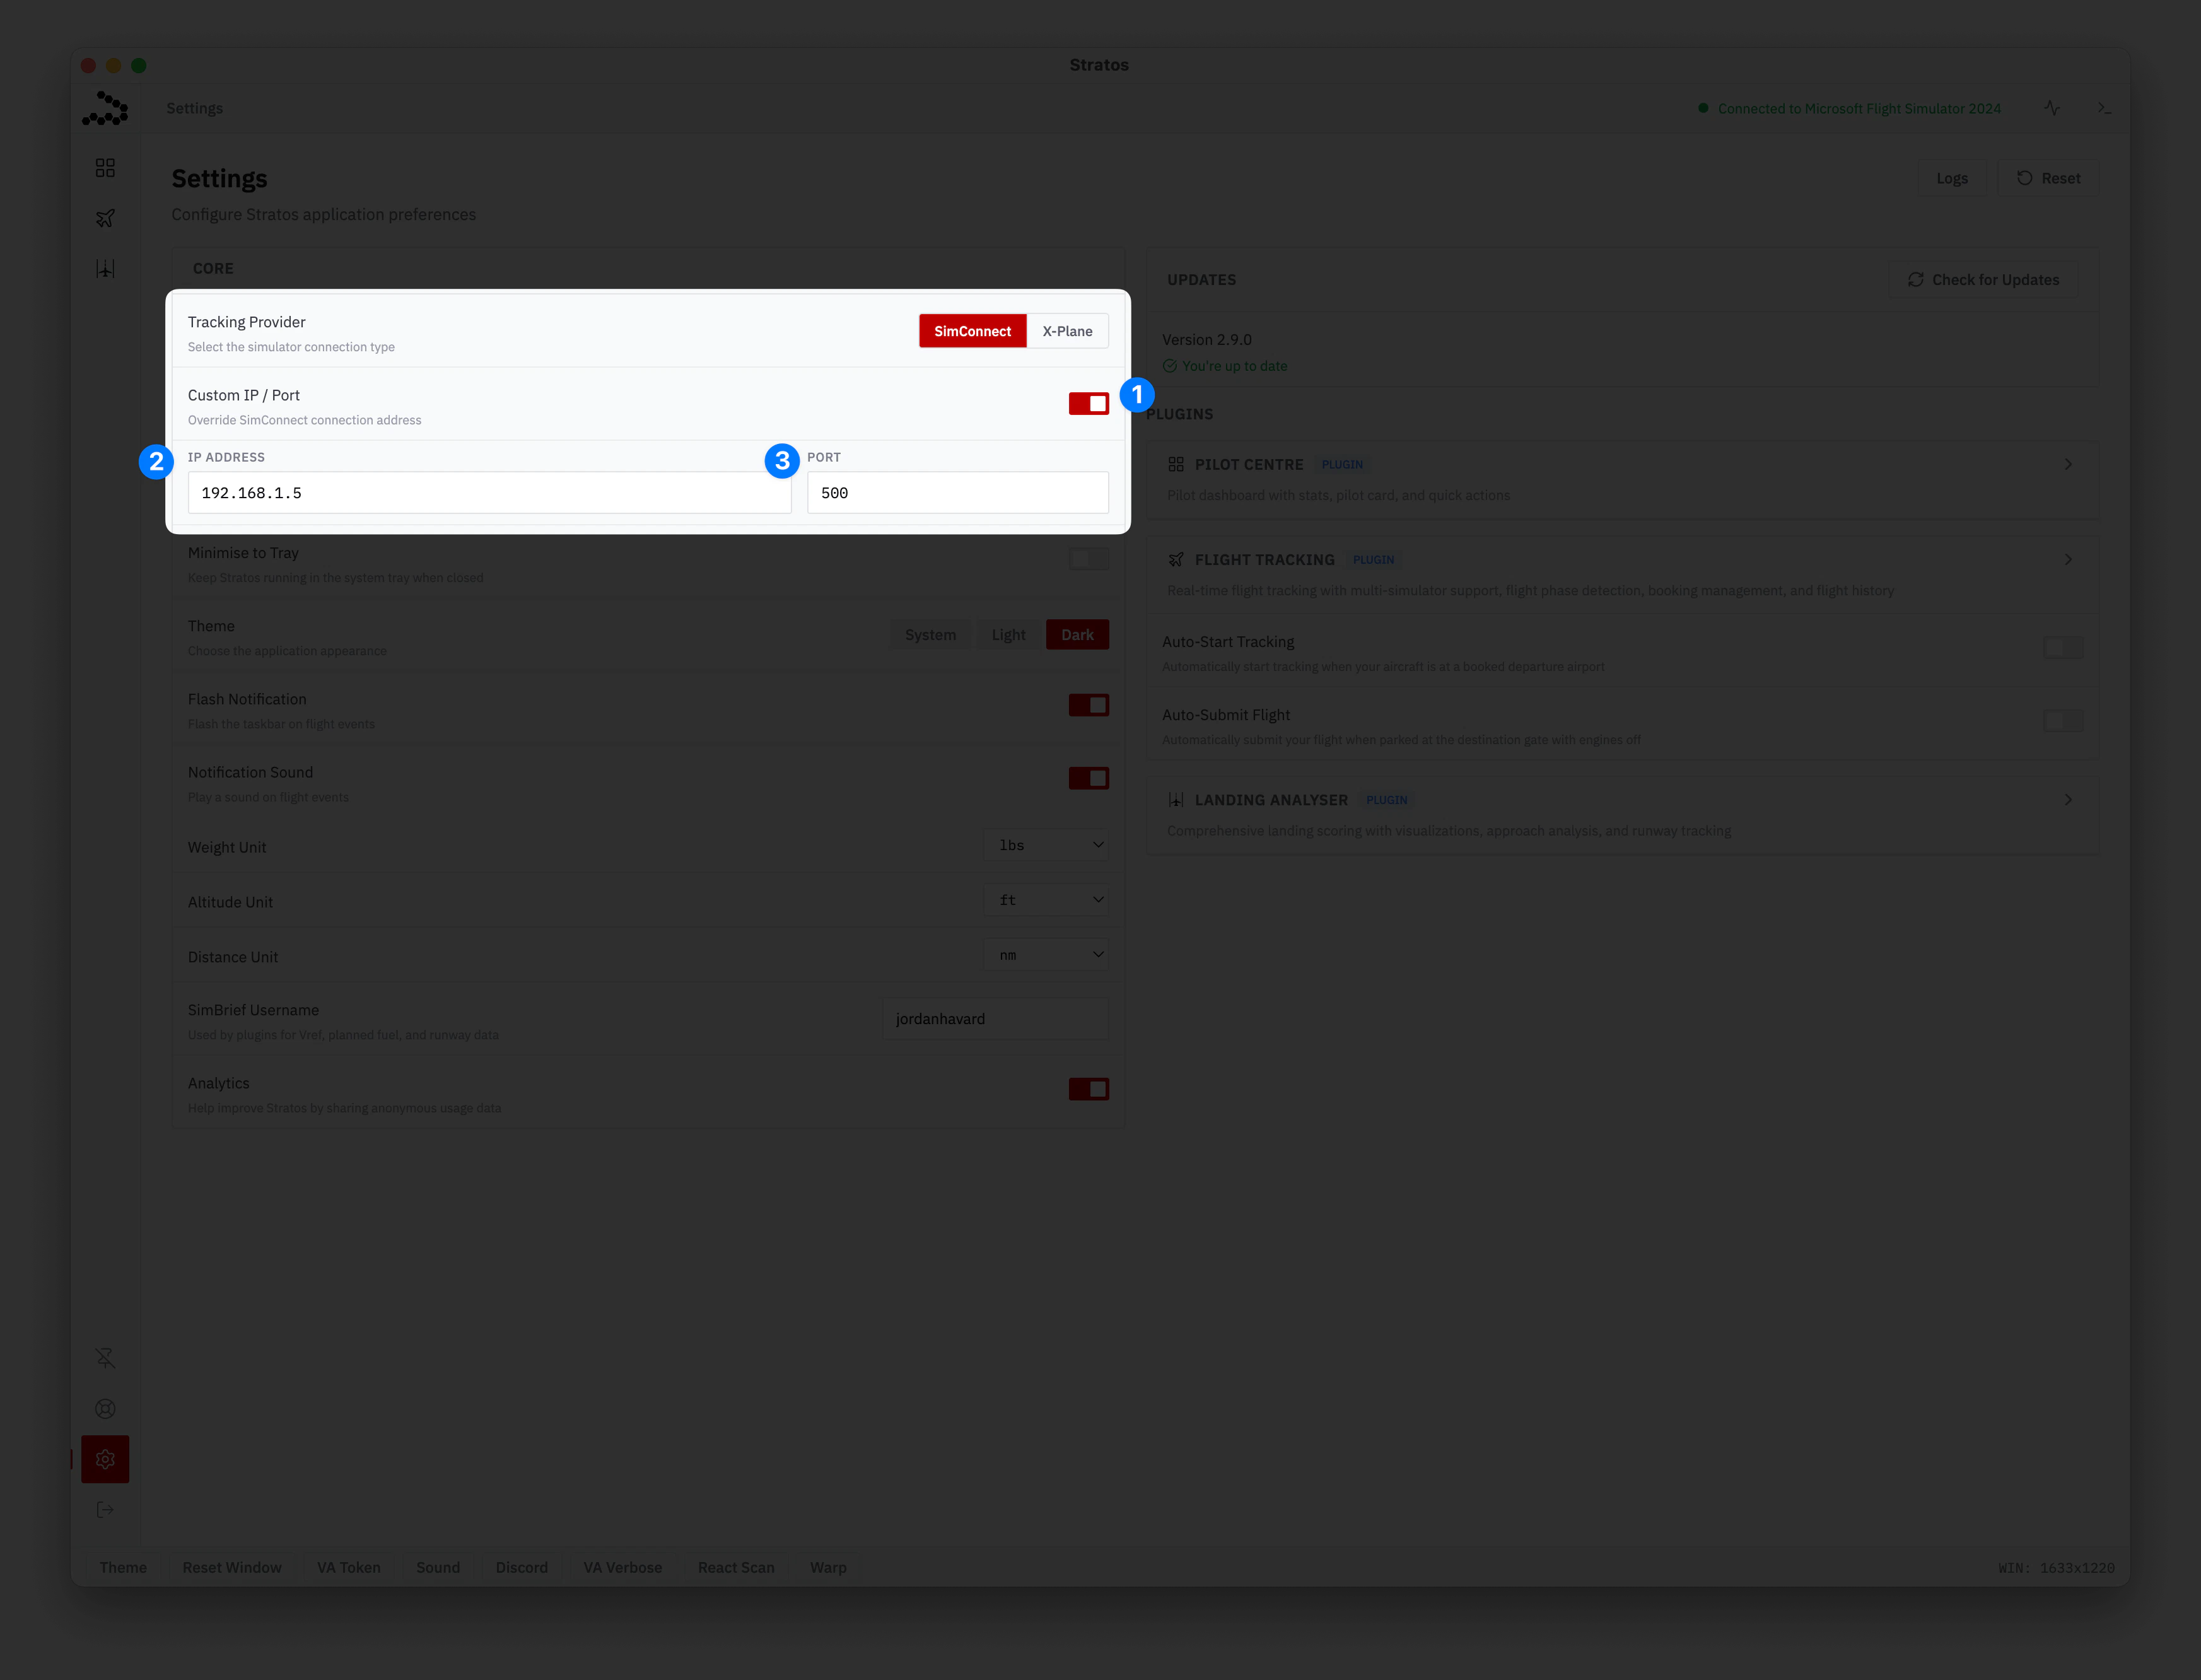
- Enable Custom IP / Port — flip the switch on. The IP and port inputs appear underneath.
- IP Address — enter the sim PC’s IPv4 address from Step 1 (e.g.
192.168.1.5). - Port —
500for SimConnect,49000for X-Plane.
Troubleshooting
The connection indicator stays grey
The connection indicator stays grey
Work through these in order:
- Double-check the IP and port match exactly between the sim PC and Stratos
- Make sure the sim is actually running and you’re in a flight (not sitting on the main menu — older sims only finish starting SimConnect once a flight is loaded)
- Did you restart the simulator after saving
SimConnect.xml? The file is only read when the sim starts - From the Stratos PC, open Command Prompt and run
ping 192.168.1.5(swap in your sim PC’s IP). No reply means the two PCs aren’t talking to each other on the network — that’s not a Stratos problem
Windows asked me about firewall access
Windows asked me about firewall access
Say yes, and make sure Private networks is ticked. If you clicked no by mistake, open Windows Defender Firewall → Allow an app through the firewall and tick the box next to your simulator.If the firewall prompt never showed up and things still aren’t working, try temporarily turning Windows Defender Firewall off to confirm it’s the culprit. If that fixes it, turn the firewall back on and add an inbound rule for the SimConnect port (
500 by default).I want to use a different port
I want to use a different port
Any free port works — Windows doesn’t restrict low numbers like some other systems do, which is why
500 is fine as a default. 5111 and 7421 are other commonly-seen choices. Whatever you put in <Port> in SimConnect.xml is the same number you enter in Stratos Settings.To check a port isn’t already taken on the sim PC, open Command Prompt and run netstat -ano | findstr :500 (swap in your port). If nothing shows up, the port is free.It connects, then drops out after a while
It connects, then drops out after a while
- Some Wi-Fi routers isolate clients from each other. Look in your router admin page for a “Client Isolation” or “AP Isolation” setting and turn it off
- On the sim PC, make sure your Wi-Fi/Ethernet network is set to Private, not Public — Public networks block a lot of inbound traffic
X-Plane connects but Stratos shows no data
X-Plane connects but Stratos shows no data
- Open X-Plane’s Settings → Network and confirm UDP data output is enabled on the port you entered in Stratos
- Some third-party plugins grab port
49000for themselves. Try setting a different port in X-Plane (e.g.49010) and matching it in Stratos
Going Back to Local
Open Settings, toggle Custom IP / Port off, and Stratos will reconnect to your local sim automatically. You can leave theSimConnect.xml file in place — it only activates when Stratos asks for a remote connection.